Description - Why go to the gym when you can bring the gym home with our Dura Lock Rubber Tiles. Available in several thicknesses, these rubber tiles are perfect for home gyms and commercial gyms. Wonder what thickness is right for you? Check below.
- 1/4" - Made for basic home gyms and exercise rooms.
- 8mm - Very durable for home and commercial gyms.
- 3/8" - The most common thickness used in commercial gyms.
- 1/2" - Ultra-durable rubber designed for extreme use.
- 3/4" - For extreme weightlifting or powerlifting.
Our rubber floor tiles are resistant to mold and mildew growth, and are as easy to install and maintain as your favorite workout routine. Plus, they're backed by a 5-year warranty so you can lift, squat, and plank with peace of mind.
Material – Recycled SBR rubber and colored EPDM virgin rubber flecks.
Size – 24” x 24” (interlocked size - 23.5" x 23.5")
Thickness – Available in 1/4", 8 mm thick (approx. 5/16"), 3/8", 1/2", and 3/4" thick
Weight – The 1/4" tiles weigh approximately 5.2 Lbs., the 8mm tiles weigh approximately 8 Lbs., the 3/8" tilees weigh approximately 9 Lbs., the 1/2" tiles weigh approximately 12 Lbs., and the 3/4" tiles weigh approximately 20 Lbs.
Recommended Uses – Our Dura Lock Rubber tiles are the perfect flooring solution for a variety of settings. Whether you're looking to create a home or commercial gym, a garage gym, a CrossFit gym, or simply need flooring for an area where fitness equipment is used, these tiles have got you covered. Their exceptional quality and durability make them a reliable choice for those seeking long-lasting flooring solutions that can withstand heavy foot traffic and rigorous workouts. So, bring home our Dura Lock Rubber tiles today and transform any space into a comfortable, safe, and stylish fitness area!
Note: – Effective January 20, 2024, only center tiles are available for purchase.
Note: – Although uncommon, an 1/8" gap is within tolerance between the tabs to account for any expansion and contraction of the free-floating floor.
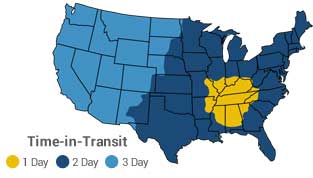
Note: – Quick ship orders that are more than 500 tiles have a lead time of 5-10 business days.
Available For Order - Ships between Aug 2 - 12
Keep your Dura Lock Rubber Tiles looking fresh and clean with these easy maintenance tips:
- Regularly sweep or vacuum loose debris and dust from the surface.
- For a deeper clean, damp mop the tiles using a mild soap and water solution. We recommend using Dawn dish detergent or Tide laundry detergent.
- Avoid using solvent or oil-based cleaners such as Pinesol, Lysol, Murphy’s Oil Soap, WD40, paint thinner, etc. These types of cleaners can break down the flooring over time.
- Do not use abrasive cleaning tools such as steel wool or scrub brushes as they can damage the surface of the tiles.
- For more detailed cleaning instructions and commercial cleaning instructions, click here.
Installing your Dura Lock Rubber Tiles is a breeze! Here's how:
- Start by cleaning your subfloor to ensure it's free of all dirt, grease, or debris.
- Begin in one corner of the room with a corner tile and add border tiles outward along the adjacent walls.
- Leave the other two edges of the room open and fill in the rest of the room, adding center, corner, and border tiles as needed.
- Once the open floor is covered, go back and cut in tiles along the opposite walls in the room. We recommend leaving a gap along the walls roughly equal to the thickness of the tiles to account for floor expansion and contraction in varied temperature ranges.
- Note: Adhesives are usually not necessary when piecing interlocking tiles together since the weight of the product is typically enough to keep them from moving. However, if you experience movement and want to ensure the tiles don't slide at all, you can use double-sided tape or mat tape around the perimeter of the installation to prevent any movement.
For printable installation instructions, please
click here.

