Description - Are you tired of your floors taking a beating from your tough workouts? Look no further! Our Extreme Mats are here to save the day (and your floors). Made from super-durable, shock-absorbent recycled rubber, these mats are designed to withstand even the heaviest of free-weight lifters who occasionally drop their weights. Plus, they're heavy enough to stay put, but not so heavy that you can't take them with you on the go. Want a permanent gym flooring solution? No problem! Just butt them together and use double-sided carpet tape to keep them in place. With our Extreme Mats, you'll be the superhero of your home gym. Use them indoors, use them outdoors - they're tough enough to handle anything you throw at them. And with our guarantee, you can trust that they'll be your workout partner for many years to come.
Material – Recycled crumb rubber and colored EPDM virgin rubber flecks.
Size – 4' x 6'
Thickness – 3/4"
Weight – Each 4' x 6' rubber extreme mat weighs approximately 96 Lbs.
Recommended Uses – Extreme rubber weight lifting mats have been used successfully as commercial gym mats, semi-portable exercise mats, in ice rinks and baseball dugouts to provide spike and blade protection, in locker rooms and at golf courses. When you are in search of the most durable rubber mats available at discount prices, these are the rubber mats for you.
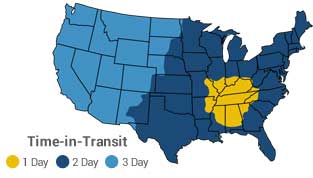
Available For Order - Ships between Aug 2 - 12
Rubber Extreme Mats can be easily cleaned in two ways. Maintenance for these rubber gym mats typically includes:
- Vacuuming any loose crumbs, dust, or debris from the rubber mat surface when necessary.
- Occasional damp mopping of the exercise mats with a mild soap and water solution. A few recommended soaps are Dawn dish detergent or Tide laundry detergent.
Note: Do not use any solvent or oil style cleaners such as Pinesol, Lysol, Murphy’s Oil Soap, WD40, paint thinner, etc. since these types of cleaners will break down the flooring over time.
For more detailed cleaning instructions and commercial cleaning instructions,
Click Here.
Installation of our rubber mats is very simple and usually done by the consumer. The typical installation of these mats is as follows:
- First, you will want to assume that the walls that the mats are abutting are not perfectly straight or square. Begin by determining the absolute center of the area to be installed. You will then determine the horizontal and vertical centers and snap chalk lines. This will become your starting point.
- Now, place the first mat in the joint of the two chalk lines.
- You will place the next mat at one end of the original mat.
Note: When butting one mat up to the next, adjacent to or end-to-end, overlap the joints by about ¼”.Then “walk” or “work” the joint back with your hands, to eliminate the overlap. This will help ensure as tight a joint as possible.
- Continue this method to the wall or stopping point. Resume laying the floor on the opposite side of the original mat and continue installation to the wall or your stopping point. If the rubber exceeds the floor space, use our Adjustable T-Square or any straight edge and Utility Knife to cut to fit.
- Begin laying the next row at one end of the room, adjacent to the first row. Fine-tune the placement with a 2x4 and a rubber mallet. To achieve the recommended “brick” laying pattern, it may be necessary to cut the first and last mats.
Note: Outdoor installations may require complete adhesion for maximum floor strength. You would follow the same install instructions as above but would incorporate the use of our Polyurethane Adhesive or our EZ Polyurethane Adhesive and Seam Sealer.
When installing our rubber mats, an adhesive isn’t usually needed since the weight of the product is enough to keep the mats from moving. However, if you do experience movement, you can use some double-sided tape or one of our Adhesives to prevent any movement.

